Test results - Visuals
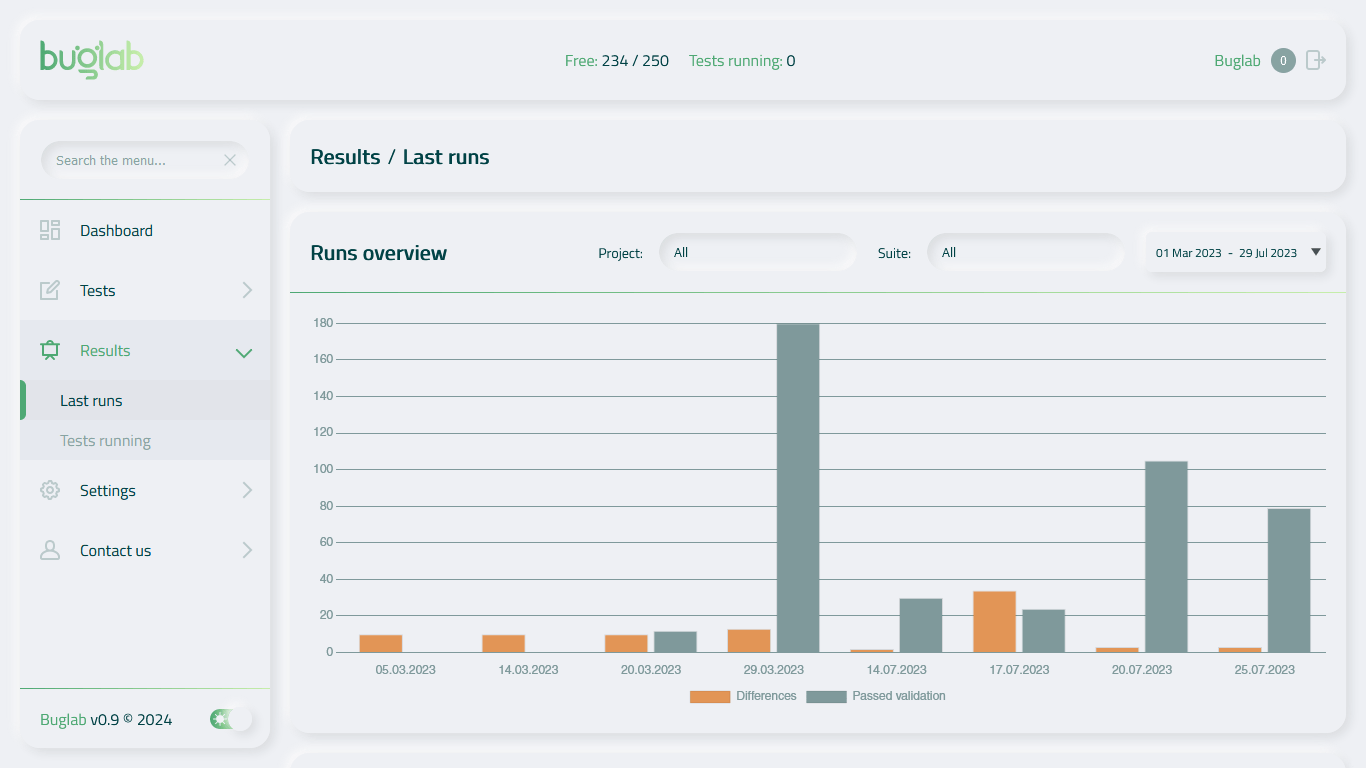
Visual comparison results.Once your tests have finished running, you can view the results in the Dashboard or under Results > Last runs:
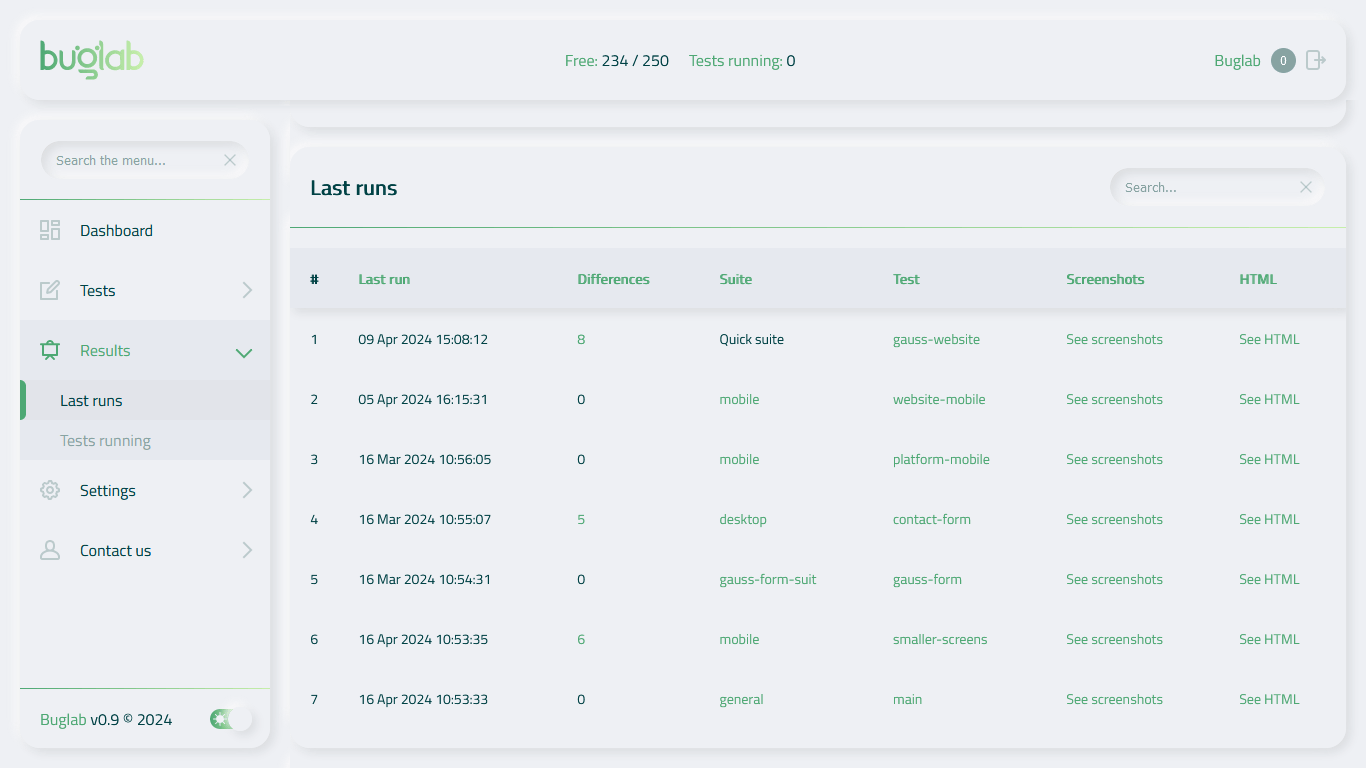
To access the screenshots, navigate to the Last runs table, and click on the "See screenshots" button for each test. This action opens up a new tab, where you can see your baseline and your new screenshots:
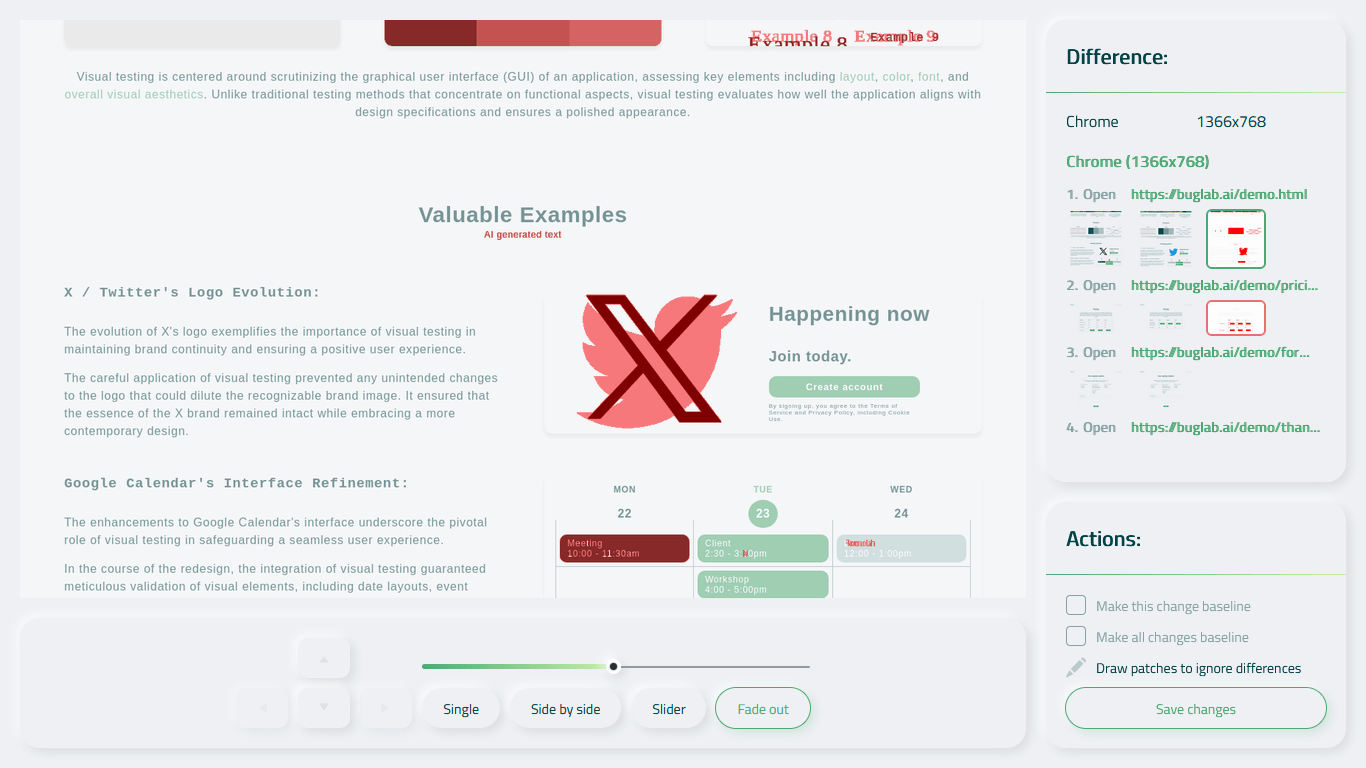
Below the screenshots on the left are the controls:
- Arrows, to navigate through the baseline and the last run screenshots;
- Single, to view the screenshots individually;
- Side by side, to view the baseline and the last run screenshots together;
- Slider, to view the baseline and last run screenshots on top of each other. Move the slider to view either one or the other;
- Fade out, to view the baseline and the differences screenshots on top of each other. Move the slider to fade the baseline into the differences screenshot.
Below the list of screenshots on the right are the Actions:
- Make this change baseline;
- Make all changes baseline;
- Draw patches to ignore differences.
After reviewing the differences, you can decide if the last run is the right version, or if you need to fix your UI. If it's the former, then you can use the "Make all changes baseline" action, and click "Save changes". If only specific differences in the test are the right version, then you can use the "Make this change baseline" for each specific screenshot. These actions replace all or some of the original baseline screenshots with the new ones from the last run.
If there are any elements that you want to disregard for future tests, you can use the "Draw patches to ignore differences" tool. Drag a square over the element you want to hide, and any future differences that occur inside the patch will be ignored.
Don't forget to hit the "Save changes" button!